

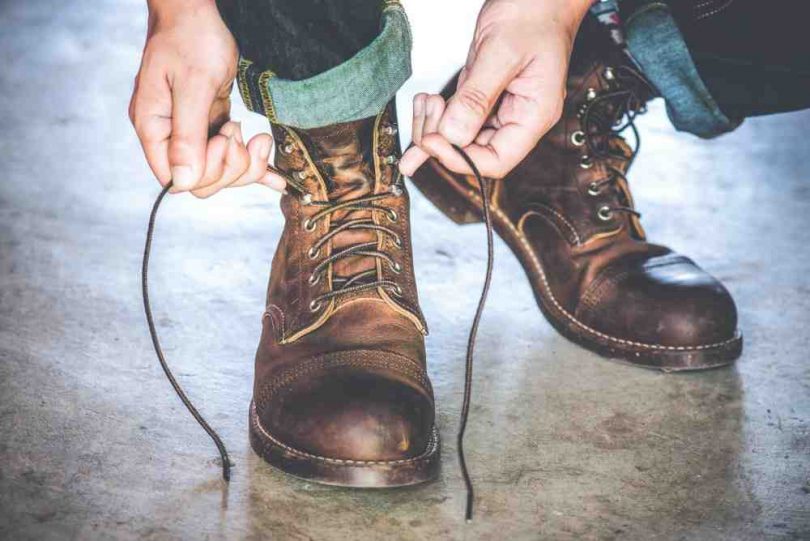
Lace Boots Like a Pro: 5 Expert Ways
1) Cross-Lacing
It’s the most common method of lacing boots. In most standard cases, the boot looks like this.
Steps:
- Go under the two bottom eyelets and come outwards. Make sure that both the laces are the same in length.
- One lace has to be thread across and up one eyelet, going from under the eyelet,and then out. The same has to be done for the opposite lace. Repeat the process till you get to the top.
Here are the steps for another variation:
- Start the process by going under two bottom eyelets and come outwards. Make sure that the right and left laces are the same in length.
- Cross the laces and go through and up the next eyelets, come outwards. Ensure that the right and left laces are even in length.
- Cross the laces and go through the next eyelet up again, but now you have to go from the inside to the outside.
- Continue alternating like this until you get to the top.
It must be noted that if the number of eyelet pairs are even, you have to start by straight across the bottom, outside to inside. Next cross the laces and go to the next eyelet up, inside to outside. Then all you have to do is to just alternate similarly, till you get to the top.
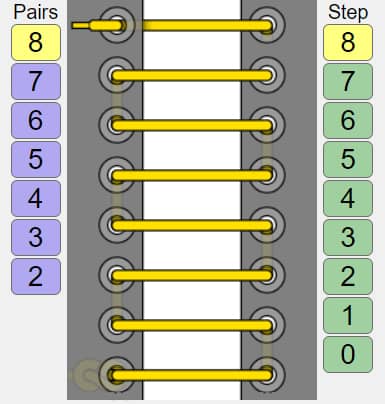
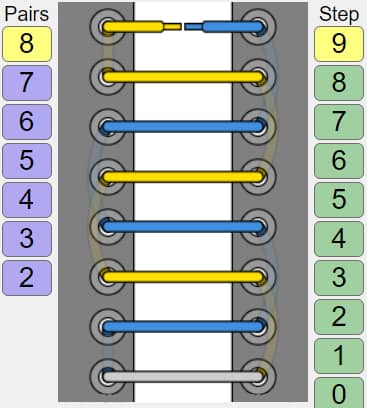
2) European Straight Lacing
-
Steps:
- Start straight across on the outside and feed in through both bottom eyelets.
- The left (blue) end runs diagonally on the inside and feeds out, then runs straight across on the outside and feeds in.
- On the inside, the right (yellow) end similarly runs diagonally and feeds out, then runs straight across on the outside and later feeds in.
- Until the lacing is complete, alternate with the right and left ends.
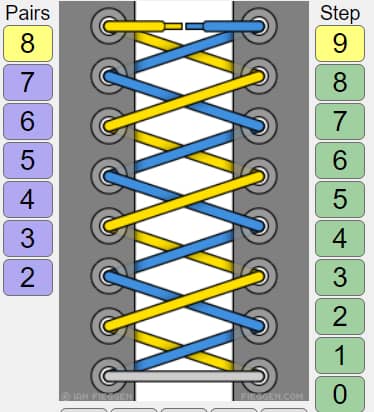
3) Over-Under Lacing
-
Steps:
- For the even numbers of eyelet pairs, start straight across on the outside (grey area) and in between the bottom eyelets.
- For the odd numbers, begin straight across on the inside (grey area) and go out through the bottom eyelets.
- At each level of the eyelet pair, alternate between crossing on the outside and through the next higher set of eyelets or crossing under on the inside, and through the next set of eyelets.
- Keep repeating until the lacing is complete.
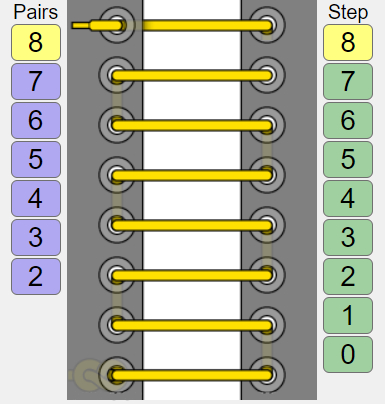
4) Straight Bar Lacing
-
Steps
- Go straight across two bottom eyelets. You have to go from outside to inside. Both of the ends of the lace should come out from under the eyelets.
- Take the right lace and go straight up to the next eyelet and pull it from inwards to outwards. Then go through the eyelet directly across the left, outwards to inwards.
- With the left lace, go straight up, skip the eyelet through which the right lace is entering. Pull it through the next eyelet, from inside to outside. Next, go through the eyelet directly across the right, outside to inside.
- With the help of the right lace, go straight up, skip the eyelet that the left lace is going through. Then pull it within the next eyelet, from inwards to outwards. Next go through the eyelet directly across left, from outside to inside.
- Repeat steps 3 and 4 till you lace to the top. For an even number of eyelet pairs, it won’t be a problem as you can go straight to the top. For an odd number, this pattern can’t be continued. Now, just cross the lace and simply go an eyelet up, from inside to outside.
5) Commando Lacing
-
Steps
- Tie a stopper knot on one end of a shoelace. The shoelace should be shorter than usual.
- Feed the un-knotted end of the lace from the inside of the bottom left eyelet and pull through till stopped with the knot that is snugly stuck against the eyelet.
- Then place it up and through the eyelet directly above it before crossing over again down and through the opposite eyelet.
- Repeat this step across each eyelet till you reach the top. Then tie another stopper knot to tie it to complete the process.
Considerations When Re-lacing Shoes
-
Length Of Lace
To get the correct laces for your shoes, always take your previous pair of shoelaces as a reference. Otherwise, you might just spend your money on a pair that is either too long or too short for your shoes.
-
Width Of Lace
Nobody wants to look ridiculous. So, as a general rule, going over anything 1 cm should be avoided so that it doesn’t look too ridiculous.
-
Colour
Choosing a neon shoelace isn’t the most style savvy choice for a chic person. Choose laces that either complement or match the color of the shoes you will wear, i.e. brown shoes=brown laces, white shoes=white laces.
-
Materials
For winter boots, waxed or even Kevlar laces should be considered while for most of the other situations, nylon, cord or cotton does the job perfectly.
FAQs:
1. What are the strongest boot laces?
Ans: Amongst a number of boot laces, the ones from paracord are the strongest ones. An impressive break strength of 550 lbs and the double crimped steel tip give the lace a great appearance. For a rust proof and long lasting performance, the steel tip is plated with nickel.
2. Are flat or round laces better?
Ans: Round laces are usually more durable and can withstand far more pressure. Most boots also have these laces because they can withstand significantly more pressure and get stronger tugs. Flat laces on the other hand are more standard and have less hassle for shoe manufacturers. So on most shoes, you will find them. Apart from that, due to their thinner and round laces, they are not bulky at all, being ideal as running shoes.


Leave a Comment